
The pour-over coffee maker is considered to be an all-time classic in the world of brewing coffee. It has been around for years and has not lost popularity since then. This coffee maker is also one of the simplest ones to use, making it perfect for beginners and professionals.
A pour-over coffee maker is a popular way to make coffee at home; they are an alternative to a traditional drip coffee maker. It comprises two parts: the carafe and the cone-shaped filter. The carafe holds the water, and the filter keeps the ground beans.
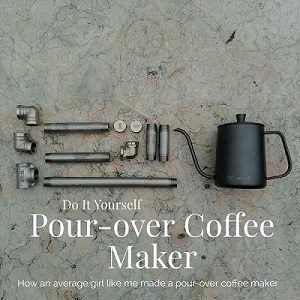
How an average girl like me made a pour-over coffee maker.
Want to give your coworker a high-five, in the face, with a chair?
Need coffee -_-
Confused about why round pizzas with triangle slices come in a square box.
Need coffee O.o
Thrilled that unicorns are real; we just call them rhinos.
Need coffee : )
Pleased with yourself because you just made a perfectly popped bag of popcorn?
Need coffee XD
Whatever you’re feeling, coffee is and will always be your best comrade.
Like my very own dashing philosopher always tells me, “Take it easy little chomper! Life is easy”.
In this coffee cruise, I will show you how an average girl like me made my pour-over coffee maker, my experience throughout the process, and how I was able to create gourmet coffee while having little experience.
Coffee is so Fanstatic, it’s un-BEAN-lievable! Get it? Un-bean-lievable? Cause, bean – coffee bean! *buh-dum-tsss*
Okay, okay. Give me a break.
I wanted to come up with a clever and catchy statement, which was the best I could do.
But you must admit that was clever, and I made you laugh! What? No?
You’re a hard one to please, my friend.
Let’s get down to business and talk about how fantastic coffee is.
One fascinating fact about coffee is that there are several ways to make it.

May it be the most simple instant coffee pack (for the kind of people who disregards the art of making coffee) to the most obnoxious drink ordered in Starbucks (for the type of people who prefers the convenience of having someone else do their bidding).
Pour-over coffee is one of the ways that got me brewing for more caffeine.
Pour-over means pouring water over the roasted coffee grounds through the filter to extract that robust and rich taste of coffee into your cup. Sounds very simple, right?
Why I ditched the machines and switched to manual Pour Over Coffee Makers
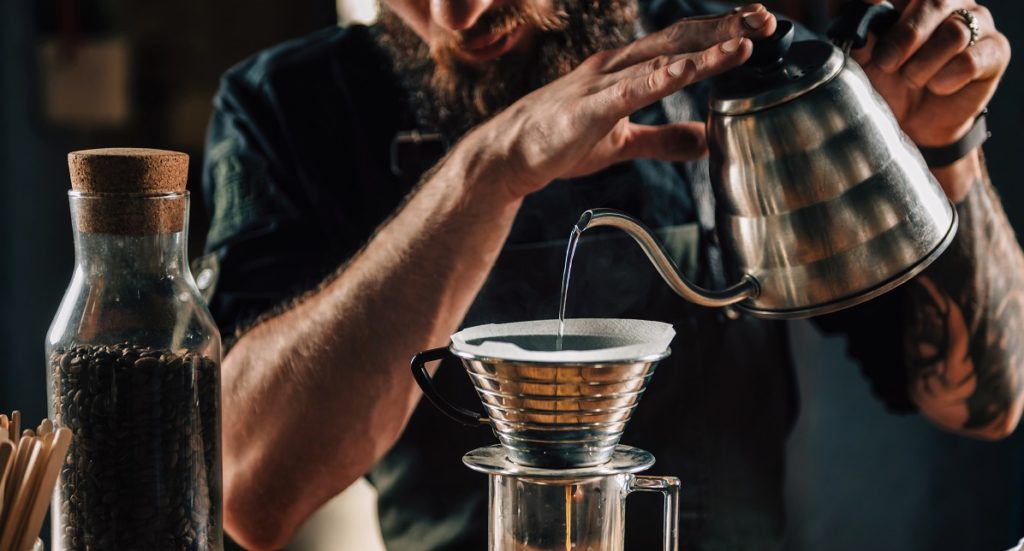
Every cup you create using a pour-over coffee device highlights coffee’s unique nature and flavors.
I’m not saying that the machines don’t do any justice in making coffee, but when you do it manually, it’s beautiful!
Picture yourself driving a stick shift, a manual transmission car.
Every gentle wiggle of the gear stick to see if you’re in neutral. Then, ever so lightly moving it from side to side.
You begin to feel the machine rumble with every turn of the key. Then, finally, you hear the beast growl.
With every water poured, you begin to whiff the welcoming aroma. Then, finally, you feel the beans bloom.
Driving a stick shift is an art to master. But making coffee Is a masterpiece.
Figuring out the clutch and shift timing is crucial when driving a manual car.
If you don’t, then expect to jerk, stall, and even miss shifts.
You might consider adding a little more coffee or a lot less. Or, it will probably pour the water hastily, spilling it all over.
Even with the water temperature and the time to let the beans bloom, you must find the right balance.
There are a lot of things that you need to consider.
That’s why driving a stick shift is the same as creating pour-over coffees.
Both take time, effort, and patience to master the art.
You have better control over both pour-over coffees and manual cars.
Doing it manually just gives thrilling satisfaction.
Pour it over and let it drip!
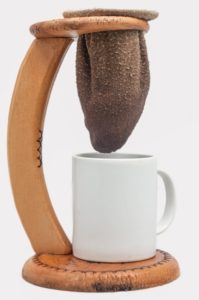
I’ve watched a lot of Youtube tutorials on DIY pour-over coffee makers, and I stumbled upon a coffee-making device used in Costa Rica.
They have a coffee maker called the corridor.
It is a coffee-making device used in Costa Rica where you pour hot water over the coffee grounds cradled in a cloth filter on a wooden stand.
The liquid then drips into a cup.
how did an average girl like me make a gourmet pour-over coffee maker in under 1 minute?
Because we didn’t own a pipe cutter at home and didn’t want to break my budget buying one, I decided to look for alternatives.
Honestly, before I started writing this article, I didn’t know what I was thinking and planning to do.
I had no idea how I was going to pull it off.
How was I even going to find suitable pipes?
Luckily, the great world wide web is always ready to give a helping hand.
So if you want to learn where I got my inspiration, check out this link https://www.youtube.com/watch?v=Lv1phK-04lI#action=share.
For those of you who are wondering how I did it, Here’s how…
DIY Pour Over Coffee Maker Parts:
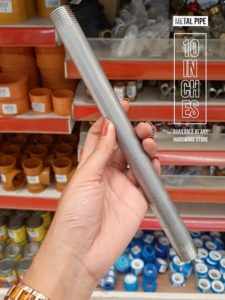
1 piece of – 10-inch long metal pipe (threaded ends)
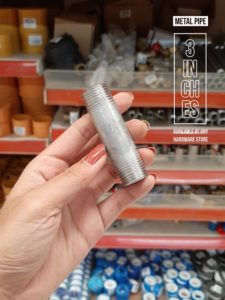
3 pieces of – 3-inch long metal pipe (threaded ends)
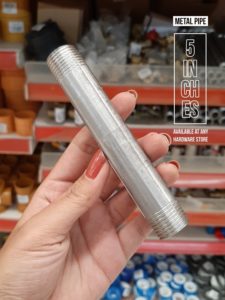
3 pieces of – 5-inch long metal pipe (threaded ends)
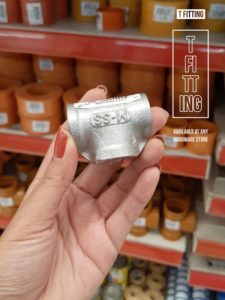
2 pieces of – T fittings (threaded inside)
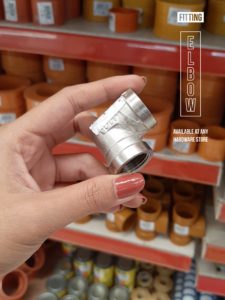
3 pieces of – Elbow fitting (threaded inside)
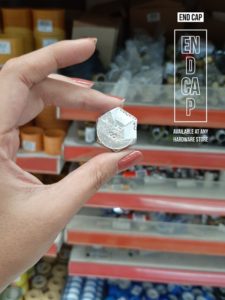
2 pcs. – End caps
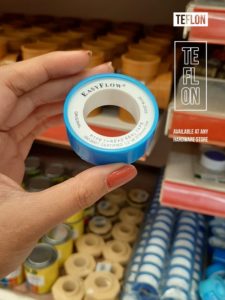
Teflon (optional)
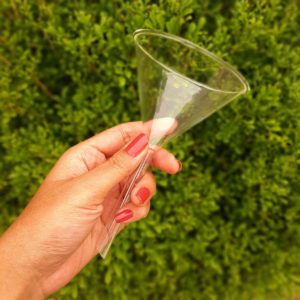
10 mm glass funnel

Gooseneck kettle
PROCEDURE
First, you must gather all the metal pipes and fittings.
Now again, I had limited options for the sizes, so if you feel the need to change it, be my guest.
Grab the 10-inch long metal pipe, and make sure you can handle it. Marvel over it.
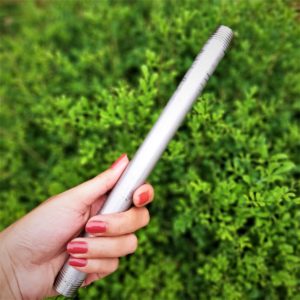
We’ll use the most extended pipe as the vertical piece,
Another reason why I fell in love with the pipes I bought was that they already had grooves in them. I had no trouble attaching the pieces.
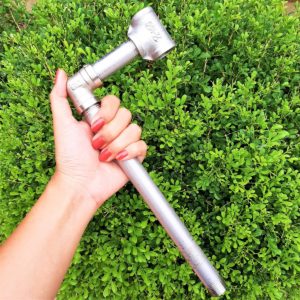
I used the 3-inch long metal pipe for the horizontal support piece that attaches to the T fitting. This is where the glass funnel is held in place.
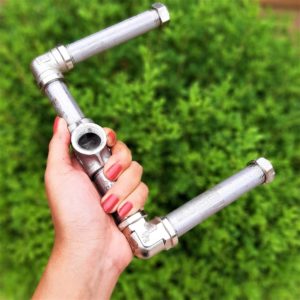
For the base, use the remaining pipes. A great and stable foundation is what you need for this project. It’s what we all need. It’s what the world needs. As the saying goes…
You can’t build a great building on a weak foundation. You must have a solid foundation if you’re going to have a strong superstructure.
– Gordon B. Hinckley
So, make sure you have a solid base.
Make sure that the fittings… well, fit right! You can use Teflon for additional grip.
The technical term for Teflon is PTFE (Polytetrafluoro Ethylene).
Teflon is the brand name which it’s commonly sold under. It’s manufactured by DuPont.
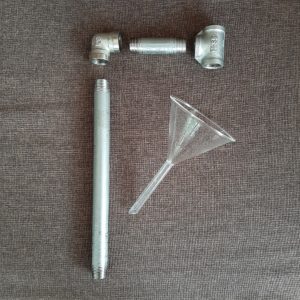
Lastly, add the funnel.
You can choose any kind of funnel you want.
I preferred using a glass funnel because it adds more flair.
This is the best guide I could do.
If you’re as confused as me reading my “how-to-do-it” list, here’s a visual.
Pour-Over Coffee Maker
STEP 1:
The 3-inch long metal pipe is for the horizontal support piece that attaches to the T fitting. This is where the glass funnel is held in place. The 10 inches long will be attached to the base.
STEP 2:
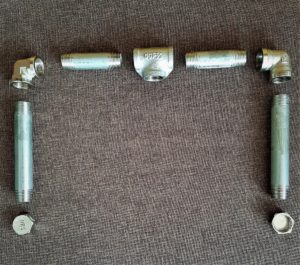
These are the remaining pieces. Attach all of the elements to create the base.
STEP 3:
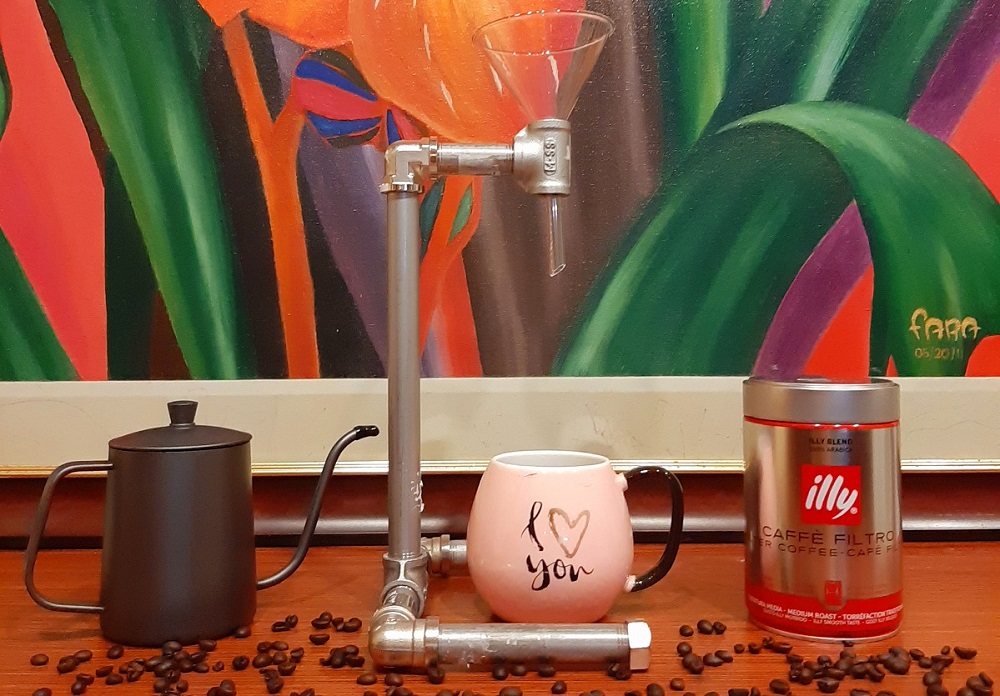
You’re very own pour-over coffee maker!
And voila! Start brewing mi amigo!
You don’t have to be a hipster to Use a Pour-Over Coffee Maker
That rich, welcoming aroma you whiff in the morning.

With that one sip you take, your senses are revived.
That perfect black brew.
Trust me, you don’t have to wear a beanie to make terrific coffee!
The perfect way to create coffee is to make it how you like it!

Make it as rich as you like.
As rich as the sky full of stars.
Make it as strong as you like.
As strong as the mountain will stand no matter how much the wind howls.
Make it as black as you like.
As black and dark as the starless night.
The best thing about making coffee is that you can experiment with it.
Again, make it how you like it!
A good cup of coffee is the best way to start your morning.
Blah! Why does it taste so papery?

I heard that the best paper filter to use is a non-oxygen bleached filter. However, I’ve also heard others say that cloth filters are the best way to go.
If you’re a coffee enthusiast, you’d know that coffee tastes different from each coffee bean, and sometimes the coffee filters affect the coffee taste.
There are 4 coffee filters that I know of so far.
There’s an oxygen-bleached paper coffee filter, a non-oxygen-bleached paper coffee filter, a metal coffee filter, and a cloth coffee filter.
First, I tried both paper filters; there’s really no distinct flavor difference between the two paper filters.
The only thing that I disliked was the papery aftertaste.
I thought, maybe it’s just the kind of filter I was using. But I tried another piece and still got the same papery aftertaste.
So I said, maybe paper filters are not that great.
Next, I tried the metal coffee filter.
I had no problems using it.
I thought the metal would somehow mess up the brewing process, but it didn’t!
Lastly, I tried the cloth filter.
There was no aftertaste.
Make sure to rinse and clean the filter before using it, though.
The cup I made was very clean.
It was almost like the cloth cradled all the coffee ground and filtered a rich, smooth coffee.
Some say to wash it very well between brews; others would say just to rinse the grounds off the cloth.
Whatever your preference is, do it.
my brewing adventure With A Pour-Over Coffee Maker!
While doing the experiments and furthering my brewing knowledge, I’ve come up with 5 points to ponder.
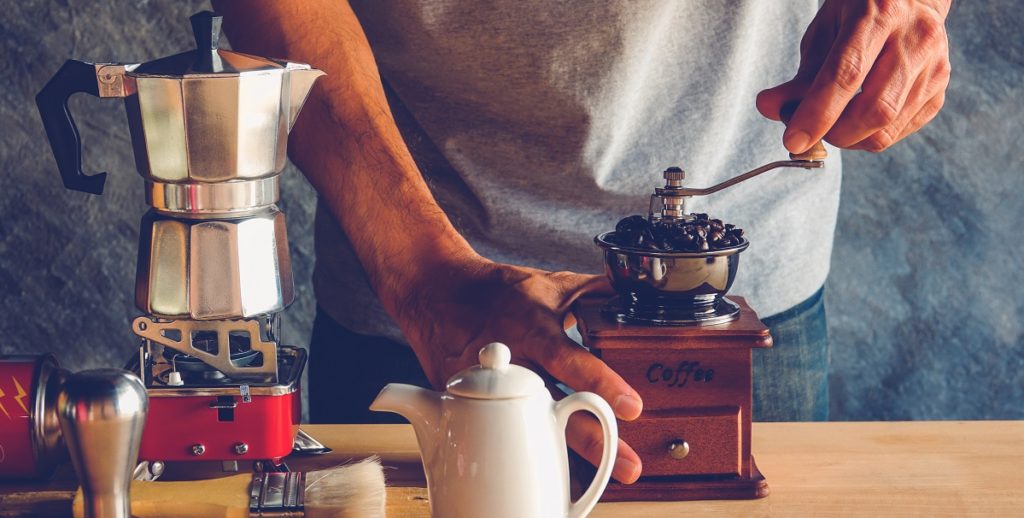
1. Break and Brew
I know you’d agree when I say that the best-tasting coffees are made from freshly ground beans before brewing them.
Have you ever wondered why the aromatic smell seems to fade when you open your pack of ground coffee beans?
Yeah, why is it, little chomper?
Well, my friend, this is because coffee loses its quality almost after the grind.
No matter how much care we put into preserving the aroma and flavor, the best practice is “break” the beans and brew immediately.
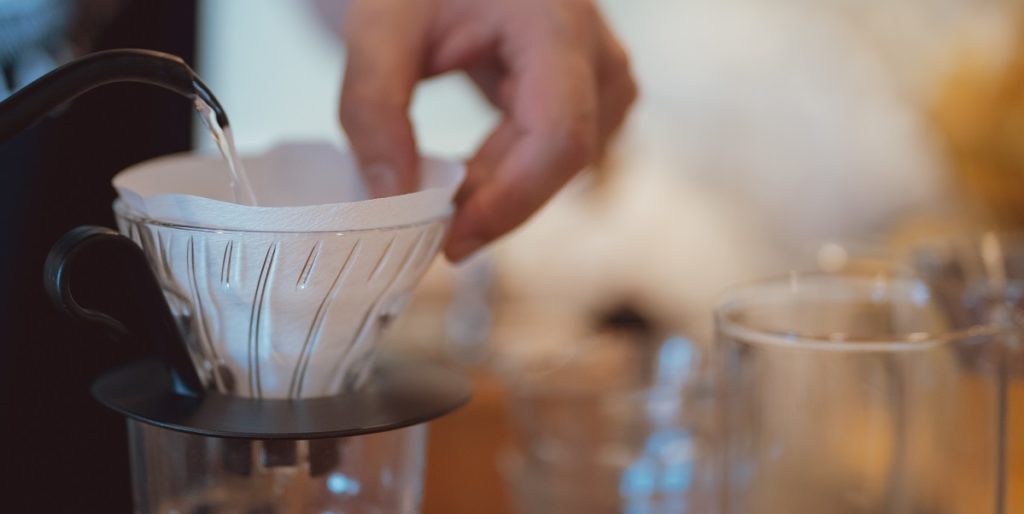
2. Wet It as You Mean It!
You must “wet” your filter with hot water before brewing.
It makes a cup of coffee taste better.
That was why every time I brewed with paper filters, it had a funny aftertaste.
Well duh! Genius.
Wetting helps removes the papery aftertaste.
I found a site where they did tests on wetting different paper filters; check out this link http://www.brewingisforeveryone.com/blog/the-importance-of-rinsing-your-filter-papers.
2. Let the Bean Bloom!
“The flower that blooms in adversity is the rarest and beautiful of all.”
– The Emperor, Mulan
To fully appreciate a flower’s beauty, we must see it fully bloom.
Think about this, the coffee is the flower, and the adversity is the hot water poured into it.

You want to get the best coffee extract and that high caffeine kick.
4. Go Buy Some Gooseneck! You’ll Need It!
Why do you need to buy a Gooseneck kettle when you already have an excellent working pot at home?
Well, you want to create a masterpiece, right?
Then listen to me; you have to have the right tools for it.
When I’m not working on my articles, working my 9-5 job, diving, or surfing, I paint.
Yes, this little chica has a lot of surprises up her sleeves!
Before creating some art, I always see that I have suitable quality paints and brushes.
Proper tools, people! Right tools!
A gooseneck kettle is crucial because it helps you control the water poured over your coffee beans.
You don’t go into battle without carrying the right weapons. You would instantly lose the war.
5. Don’t go too fast, or you’ll regret it!
The art of brewing great coffee and having great results is how you take great patience in making it. As the saying goes…
“It takes time to create excellence. If it could be done quickly, more people would do it.“
– John Wooden
So, go ahead, take your time in pouring that hot water. Give love to it.

Do it with great patience and care.
Embrace the process, and you’ll surely love and enjoy the results!
The great pour-Over Coffee Maker takeaway
I had fun doing the project and was even pleased with the outcome.
Not every day can you witness someone so average and naive make a masterpiece.
Just make sure that before you buy the pipes, you already know what you want and what it would look like.
If it helps, picture it in your head or sketch it on paper.
It is always better to visualize everything so you’d know the necessities to purchase.
Well, it wasn’t a walk in the park for me, though, as you know.
Before I started, I doubted if I would ever pull it off! I didn’t even know if I would find suitable pipes.
It wasn’t just one hardware store that I went in.
If my memory serves me right, I think I visited at least five stores until I found one.
So please, for the love of coffee, don’t give up!
You don’t just stop and give up whenever you come to a roadblock! You take a detour.
I do believe manual coffee brewing is such a great and fulfilling experience.
I just showed you how an average girl like me made my pour-over coffee maker.
That said, I’m sure you’ll be able to recreate what I just did, maybe even a better version than mine!
If you do, please do share!
I’d love to see your DIY pour-over coffee maker!
If I could do it, so could you!
Try it for yourself!